www.Allthingsribbon.com

Finally a bow to buy an outfit for!

Wednesday, September 26, 2012

A Mum Pattern


The instructions for these adorable flowers are now available in the shoppe!


Have fun!~

Friday, August 3, 2012

Back to School Gift Code Giveaway!~

Just in time for a little Back To School shopping!

All Things Ribbon is giving away a $25 gift code to the shoppe!  Hurry and get your entries in!!  Good Luck!~
a Rafflecopter giveaway

Saturday, June 23, 2012

Etsy & A Tutorial


Have you heard of Etsy? Etsy is an online store where you can purchase handmade items of all kinds!


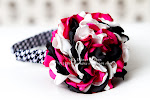
 Some of All Things Ribbon's new creations can be found on Etsy, including this headband!


 Click the link here to see the headband, and here to see our shoppe. 


Isn't it adorable?! Do you want to be able to create this on your own? View our tutorial here 
Hello everyone!

After a not-so-brief break from blogging, I am finally back! Here is one of my latest creations:


Big stacks like such as this are so versatile -- think of all the outfits that this could match!

The vibrant colors and happy prints are perfect for summer wardrobes.  You can find an adorable selection of All Things Ribbon Big Stack hair bows HERE

Tuesday, February 14, 2012

Little Satin Flower Clip Tutorial

So fun and easy!

You will need
1 low temp glue gun
needle and thread
1- 2 inch square of felt
11- 2 1/2 inch satin squares
5- 2 inch satin squares
1 small pom pom
wire
headband or ribbon covered alligator clip


Carefully burn the edges of the satin. I didn't bother cutting out circles because the heat makes the satin curl up and when you gather it, it will look like you used circles...just without the hassle of having to cut them out!
Fold the petals in half, with the satin edge on the outside and stitch through the middle of the petal.
You will need to use three seperate threads for each set of 5 petals. This would look adorable with 6 or 7 and multiple layers of petals too.
When you have all the petals gathered it is time to carefully glue them around the felt. I love my low temp glue gun, it is all I use. Glue around the outer edge and adjust the petals as needed
Trim the thread.
Now you are ready to add the second layer. It is a smaller space so you will need to cinch up the thread a little more. Add the glue and work around the flower gently pulling on the thread to gather the petals.For the small inside layer I tie off the thread and adjust the petals and glue it all at one time.
SO CUTE!!
Before I add the center, I pull apart the petals and fluff up the flower so it looks nice and full.
For the center in this flower I covered a soft pom pom with satin and wrapped wire around it to secure it.
I trimmed the excess satin off and sealed the edges. You could also cover a button with the satin. That would be so cute too!
Squeeze some glue in the center of the flower and add your embelishment. The great thing about the wool felt is if you glue something to it...it isn't moving. I love using wool felt for most of my creations. It also gives the flower a professional finished look.
How cute is this?

Let me know if you try it!!