

Now available in our Shoppe
Everyday basic baby bands in several darling colors, only $4.50!~


.jpg)


 So fun and easy!
 Carefully burn the edges of the satin. I didn't bother cutting out circles because the heat makes the satin curl up and when you gather it, it will look like you used circles...just without the hassle of having to cut them out!
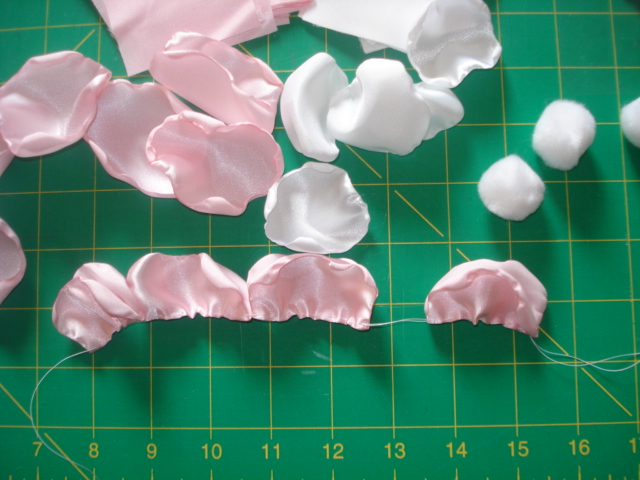 Fold the petals in half, with the satin edge on the outside and stitch through the middle of the petal.
 Trim the thread.
 For the small inside layer I tie off the thread and adjust the petals and glue it all at one time.
 SO CUTE!!
 Before I add the center, I pull apart the petals and fluff up the flower so it looks nice and full.
 For the center in this flower I covered a soft pom pom with satin and wrapped wire around it to secure it.
  I trimmed the excess satin off and sealed the edges. You could also cover a button with the satin. That would be so cute too!
 Squeeze some glue in the center of the flower and add your embelishment. The great thing about the wool felt is if you glue something to it...it isn't moving. I love using wool felt for most of my creations. It also gives the flower a professional finished look.
 How cute is this?


You will win the entire outfit! Both the dress and stunning headband are up for grabs.
Your Name
an email address
Who would look absolutely adorable in this dress!
DEADLINE:
Entries will be accepted until Wednesday November 30, 2011 at 12pm MST
This means you will have time to earn extra entries!
**EARN EXTRA ENTRIES** Don't Forget to leave comments for each entry
#2 For an extra entry~~"Like" us on
#3 For extra entries--Send your friends over to our All Things Ribbon page to “Like” us and then have them leave a comment on our Facebook page telling us that they “liked” us and who sent them. I will be "liking" each comment and adding them as an entry as they are posted.
(say that 5 times real fast!)
Each comment counts as an entry for you into the giveaway.
Imagine the possibilities!
#5 For an extra entry~Don't forget to snag my button! It loves to be copied and pasted ;) Leave a comment for this as well!
#6 For an extra entry!! Follow me.
#7 Click the "share" button on this link posted on the facebook page. You won't need to leave a comment for this one, I can see all the shares!
GOOD LUCK!
Watch this post!!!
A Huge CONGRATULATIONS goes to ......
Bret!
Thanks everyone!
**For the dress and matching headband, winner will be randomly selected and announced on this post, The winner will have until December 2, 2011 at 12 pm MST to claim the prize and is responsible for shipping charges or it will be forfeited. Does it get any easier than this? And if you can't wait and need something from the shoppe~~There is a lovely coupon code available for the duration of this contest just type in "Winter" for 25% off your ENTIRE purchase at Allthingsribbon.com

 I have loved Hello Kitty forever! I combined this adorable resin with one of my favorite designs; the Flower Stack. This little darling is perfect for the Hello Kitty loving gal in your life. I might mention the color combo possibilities here are endless!~ Find this adorable bow HERE
 Take a look at this little muffin, if she wasn't sleeping I would want to squeeze her adorable little cheeks! Jill Photography took this amazing picture of our newest Big Stack hair bow, it turned out adorable.
 I've been getting so sick of seeing my Goose walk around in her hole-y jeans, so we cut the bottoms off today. I ripped them into 1 1/2-inch strips and then cut the strips into 4 inch lengths and sewed the strips into a flower. Then, I attached the 3 ivory roses, like the ones we put in the small rose and polka dots clip (tutorial coming soon). I let her pick out a fabric wrapped headband to attach it to and she was set! I really love the way it turned out...I am off to hunt down the rest of her pants, lol.

 Heat seal the ends of the ribbon to prevent fraying. I tie a knot at the end of the ribbon leaving about 1 to 1 1/2 inches of ribbon so I have something to hold onto. Twist and glue until you reach the end of the ribbon. I made a short little video clip on the makings of the ribbon blooms, it is at the bottom of the post...I hope you like it, lol. :)
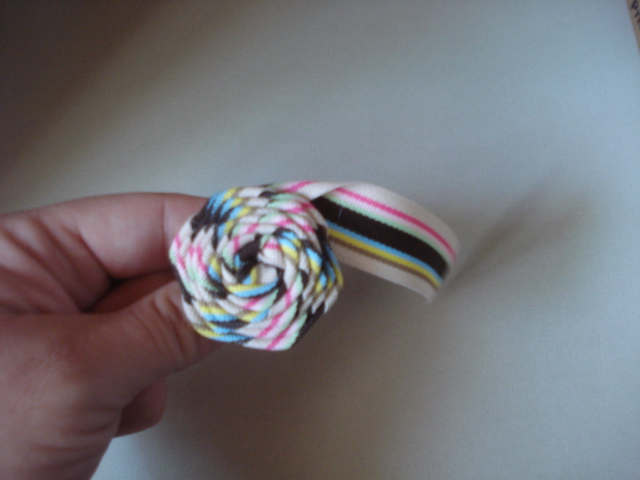 Make all five blooms, and then you can decide how you want to glue them together.
 I arrange the blooms on the felt before I glue them to get a nice idea of how the headband will look when it is finished. This is where you can hide any mistakes or pokey little ribbon pieces that didn't get tucked into the bloom...
 Glue your first bloom onto the felt...
 After I have all four blooms on I hold them down to make sure they are on for good!
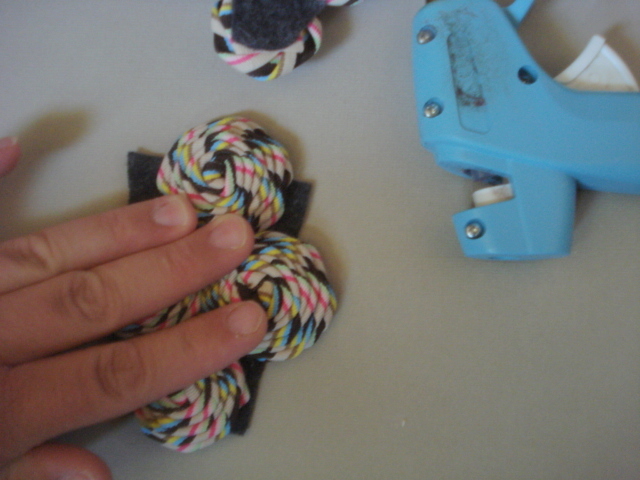 You need to trim the excess felt...
 Turn it around and glue the fifth bloom on the top...
 I like to glue the blooms about an inch from the bottom of the headband, this generally puts the piece right above the ear...
 Take a one inch piece of felt that you have measured to the length of the bloom piece..
 While you are securely holding the bloom piece to the headband, apply the glue to the strip, and work your way down...
 Make sure the felt is sticking together, you won't need a ton of glue, that will make it look messy....

 Oh my goodness, I love it! The striped ribbon is so cute and a lot less stiff then a solid color grosgrain and so much fun to use, you're going to love it!~
 And there you have it! Your own Ribbon Bloom in Stripes Headband. Well done!~


 Posts
All Comments
Posts
All Comments


